Everything I know about Ski Gear
- Oct 29, 2024
- 12 min read
Updated: Nov 17, 2025
...as someone who knew nothing a year ago
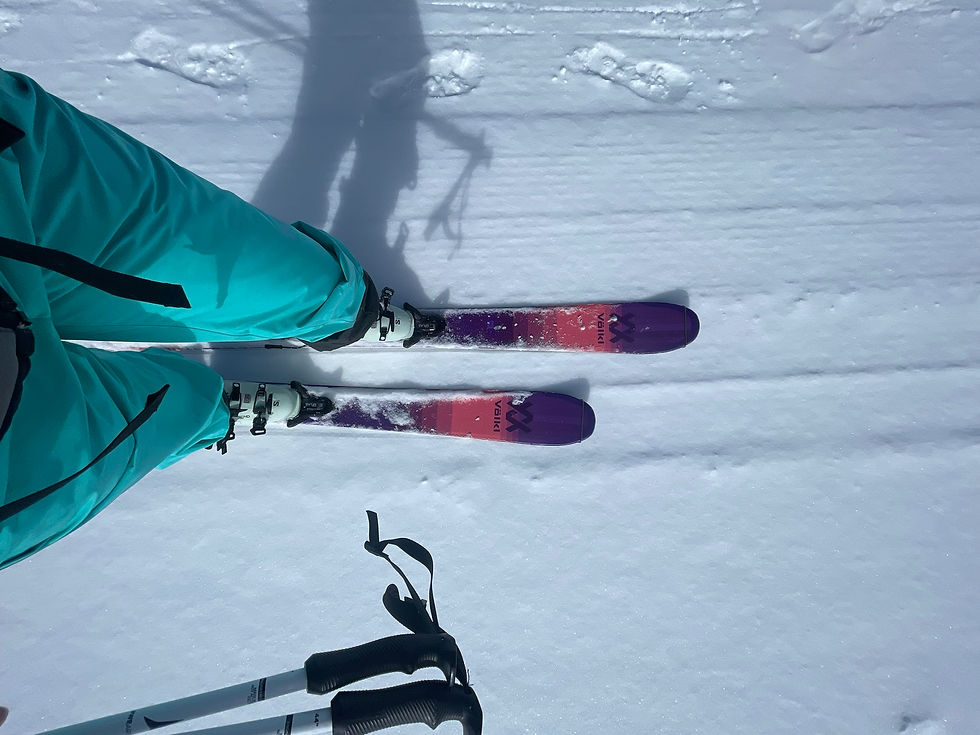
A year ago, I moved across the country for a ski season because I could not imagine a winter without getting to do what I love so much. I knew very little about ski gear when I bought a used pair of skis to start the ski season. Now, as we get ready for this year’s ski season, I want to share everything I know in hopes of helping someone who was in my place a year ago or who is new to the sport and just wants to know more. I have always had a passion for skiing and absolutely love spending my winter exploring the mountains. As my skiing has improved so has my gear and I want to share what I have learnt so you can feel as cool as I do having all this knowledge. I am going to break this down into sections about each piece of gear.
Let’s start by discussing what I recall knowing a year ago. It is not much but it could be all you know too! I knew that skis had different widths and lengths. Fatter skis being for powder and skinner skis being for racing or groomed conditions. In terms of length, you wanted a ski that came up to about your nose. I knew there were many different ski boot options and that your bindings had to be adjusted to make sure your skis come off when you fall. Your skis needed to be waxed and sharped to be able to glide over the snow and carve better. Now let’s get into what I have learnt in the past year. Most of this knowledge has come from being around skiing and having friends that talked gear with me, as well as some of my own research and speaking with people at ski shops.
Boots:
Starting off with what I believe (and almost everyone in the ski community would agree with) is the most important piece of gear: Boots! Your boots are what connects your feet to the snow so they will determine how well you ski. I would say that boots are the most complex and person specific piece of gear so I am going to try and make this as simple as possible. If you are ready to invest in the right ski boots for yourself, I could not recommend more that you go to a ski specific store and do a boot fitting with someone that knows everything about boots. If you go to a boot fitter and already have boots, bring them with you and bring your favourite ski socks. At the boot fitting they will likely scan your feet to get exact measurements and help fit you in the best boot for your feet and skiing ability.
How should ski boots fit? They should feel secure and you should not be able to move your foot around in your boots. There should not be any extra space in your boot and you should be able to feel the liner on all sides of your foot. Your liners can be heat molded to help make them more comfortable for you. You can also get custom insoles which will help keep your foot supported in the boot. You want the arch of your foot to be supported which most likely is not the case with the insoles that come with your boots. There should not be any extra space in the boots around for feet.
The three measurements for boots are size, width and flex. Size is your typical foot size just like any footwear, although the numbers are different than what you have seen before. If you look at a ski boot size chart it likely has a comfort fit and performance fit column. This is because depending on your skiing ability you are going to want your boot is fits different. Performance fit is a smaller size and are usually a little more uncomfortable to break in. Comfort fit will be exactly that, comfortable and usually ideal for a more casual skier. Width is the width of the boot, so depending on how wide your feet are you may need a slimmer or wider boot. These width measurements are in millimetres and would start at something like 100mm at the biggest boot size and every size you go down the boot gets a little less wide. Flex is how stiff your boot is, meaning how easy the boot will move when you lean into the front. Flex is interesting since there is no standard between boot companies, meaning that a 100 flex in one brand could be stiffer than a 100 flex from another brand. If you are just starting to ski you are going to want a boot with a lower flex number and as your skiing improves you will want a stiffer boot.
Every boot will feel different so it is important to be able to try on many and find the perfect boot for you. Do not try to be like Cinderella’s step sisters and shove your foot into a boot just because it is pretty. You want to be Cinderella and have a boot that fits you and only you perfectly. If your ski boots happen to be a pretty colour then that is just a plus, but do not pick your boot for looks. If you are into ski touring you might choose to pick a boot with a touring capability. These boots will have a walk mode and metal cavities at the toes to be able to ski uphill.
Skis:
Obviously if you are going skiing you are going to need skis. Skis come in many shapes and sizes so a whole book could be written on skis alone. I am going to simplify what I know and what I think is the most important basic knowledge. The way you want to ski is going to narrow down your options. If you race you are going to need racing skis, if you only ski powder all season (lucky you, can I join?) you are going to need powder skis. Most people that are into skiing and have their whole winter revolve around getting to the mountains are the people who have more than one pair of skis. I currently have two pairs and want another to complete my line up.
When you are looking at skis, they will have a few measurements and numbers on them. The first is the length of the skis. The right length for you will be skis that are pretty much as tall as you. Skis are measured in centimeters. I am about 160cm and my skis are 158cm. I personally would not get skis longer than that but some people may choose a longer ski. I also have skis that are 152cm. If you are just learning to ski you will likely have shorter skis just because it is way easier to learn how to do a sport which involves having these long things attached to your feet, when the long things are shorter. The length of skis will also depend on your skiing style.
The next important number on the skis is how wide they are, which is shown with three numbers. The tip-waist-tip numbers. The waist is the skinniest part of the ski which is usually right under your foot and the tip refers to how wide the ski is at the widest point at the front and back of the ski. This number is in millimeters. Race skis will be your skinniest and powder skis being the fattest. I do not know much about race skis just because I do not dabble in ski racing. If you want a ski that is good for skiing all types of terrain and conditions, also known as an all-mountain ski you are looking at something in the high 80s to low 100s in terms of waist measurement. The best ski for you will depend on your body and skiing ability. Someone like me who is 160cm skiing on a 100 ski will feel very different that someone who is 190cm skiing on a 100 ski. Powder skis are anything in the 100 plus range and will be your fattest skis.
The shape of the skis makes a difference too. I am going to use my skis as an example, after all this knowledge is all from my experience so I can speak about my skis. My skis are 106s which are just on the edge of all mountain and powder skis. My skis are 146mm at the tip which is fat and would make them a powder ski. I like the wide tip for powder because it really helps me get up and float on the snow, which is what you want. If my skis were 120mm at the front tip they would ski quite different. I can get away with having a smaller width under my foot and still having it be a good ski in powder because I am a smaller and lighter person.
Another measurement you will find on skis is the radius. What I understand from this is that number is the radius of the circle you will make on the skis when you turn. Basically, it is how tight or wide the skis will allow you to turn. This usually has to do with how thick the skis are and the tip-waist-tip measurement.
If you are ready to invest in new skis, I would recommend demoing skis if you can. I demoed skis before I got mine and it was a great experience. Demoing skis can allow you to try out various skis so you can get a feel of what you like and how every ski is different. We could also get into the different materials skis are made of and how that changes the skis or how a ski flexes, but that is where things start to get more complex.
Bindings:
You cannot ski without bindings since they are what attaches you to the ski. There are so many binding options but I am going to break this down into alpine and alpine touring bindings. There are touring specific bindings but for the sake of this I am not going to touch on them other than to say the main difference with touring specific bindings is that they have a different release mechanism and can have a different heal piece.
Alpine bindings are what you will see on pretty much every ski at a resort. They are your standard bindings. Ski bindings have dins, which is a spring mechanism that allows your ski boot to be released from the bindings. This is really important when you fall since you want your skis to come off. The lower the din number the easier you are going to be released from the binding; higher the number the more force it will take to be released from the bindings. Your dins are set based on your height, weight and skiing ability and as your skiing improves your dins will have to be moved up. Youth bindings usually go up to about 7 and adult bindings usually start at a 6 and go up to the low teens. You do not want to be skiing at the very limit of your bindings. All bindings need to be adjusted for your specific boot size, which is usually done by moving the heal piece on the tracks mounted on the ski. Demo bindings are alpine bindings and are usually found on demo skis. These bindings are much easier to adjust for boot size.
Alpine touring bindings will have all the same things an alpine binding has plus a touring option. There a few different ways these bindings will change to touring mode. The ones I have open up to have the toe pins at the front and at the back, the brakes flip up and has a few pieces that move to be risers on the uphill. Some alpine touring bindings will have a piece that flips up or comes off at the toes to get to the pins. Either way there is a moving part at the toes that changes the bindings from looking like a normal alpine binding to a touring binding. The benefit of an alpine touring bindings is that they still preform like a normal alpine binding on the downhill and have a touring mode. There are also alpine touring bindings that do not have pins. These bindings will change into touring mode by having the whole binding lift up and do not need touring specific boots.
Both alpine and alpine touring bindings will have brakes. These are the little feet that get flipped up when you step into the skis and help keep your skis together when you carry them. Brakes come in many sizes based on the width of your skis. If your skis are 98s you will need at least 98mm brakes or something wider, but not too much wider.
Bindings can be mounted a few different ways and depends on the skier and skis. I have never mounted bindings so I do not know too much about this. If you have bindings to mount, I would recommend taking them to a ski shop to get them mounted properly. Bindings also have to be compatible with your boots and skis. There is a handy chart that helps figure out which boots and bindings can go together. I would not worry too much about this but definitely worth mentioning when you are gear shopping.
Helmet:
You need a helmet. I do not care what you have seen or heard but you going to wear a helmet. Helmets are pretty simple. You need one that fits and keeps your head warm. I have gotten all my concussions (only 2, do not freak out too much) from skiing so I cannot emphasize this enough: YOU NEED A HELMET. Newer ski helmets have Mips in them which is a technology that is designed enhance safety by allowing the layers of the helmet to rotate separately. This feature was extra important to me when choosing a new helmet because I do not want another concussion and want to protect my head has much as a can for the times that I do fall and hit my head. Most helmets will have a way to clip in your goggles so you do not lose them.
Goggles:
I almost forgot about goggles but they come in handy if you want to see. Goggles have changed a lot in recent years with some new cool technology like light sensitive lenses that change based on light exposure. You will want goggles that fit your face so I suggest trying some on with your helmet to see what you like. Some goggles will allow you to be able to change lenses which is amazing when the light changes. As someone who spends a lot of time skiing in all conditions, I wanted to get goggles that have lenses that are easy to change. My lenses have magnets in them which makes them super easy to change so much so I can change them on the lift. Most goggles with interchangeable lenses will have a low light and high light lens. Low light lenses are great for those overcast days or skiing in the clouds. High light lenses are great for sunny blue bird days.
I carry a goggle sponge with me on the hill for the times snow ends up in your goggles. This happens a lot on epic powder day sends. The sponge helps absorb any snow and water on the inside of the goggles without damaging the antifog coating. The antifog coating is important so your goggles do not fog. If you are thinking “my goggles never fog” you definitely have an antifog coating and have never boot packed on a cold day and had your whole body including your face end up sweating. The snow sponge also has a side with a microfiber material for wiping the outside of the goggles. Most ski jackets will have a cloth in one of their pockets as well. The most important thing about goggles is you do not want to wipe the inside of the lens because you can ruin the antifog coating.
Poles:
Objectively the least important and complex piece of gear, but still can get fancy. A tip I learnt to make sure my poles are the right fit is to flip the pole upside down and place your hand on top of the basket while standing and your elbow should be at 90 degrees. I have also heard that shorter poles are better but I will let you decide that one for yourself. Poles can have different basket sizes. The smaller baskets are for racing or groomed skiing, while bigger baskets are for powder. The big basket helps make sure you do not lose your pole in the deep snow.
To get fancy with poles you can get adjustable poles, which are great for touring since having a longer pole on the uphill is nice. Adjustable poles are also good for growing kids or to be used as hiking poles in the off season. There are also poles that have long grips so you can change where you hold the poles based on the skiing you are doing. I have shied away from these poles because if you hold them lower than at the top you have this beautiful part that sticks out the top of your hand and can very easily smack your face. Just a personal opinion of mine; I do know people that love them.
I am going to end here. There is more stuff I know since we have not yet touch on backcountry skiing or what you wear. I hope this helps anyone who wants to know more about gear and learn what I consider the basics. You will of course learn more if you are into skiing. My biggest tip is to never under estimate your knowledge and just because you are a girl you can still know more than the guy that is trying to fit you in boots that are not made for your feet. When it comes time to pick new gear do not be shy and remember everything you know, because it is not nothing. Do not be afraid to express your needs when it comes to gear. Skiing is not a cheap sport and the last thing you need is to feel like you wasted money on a piece of gear that does not work for you.

Can you tell us about the helmet cover?